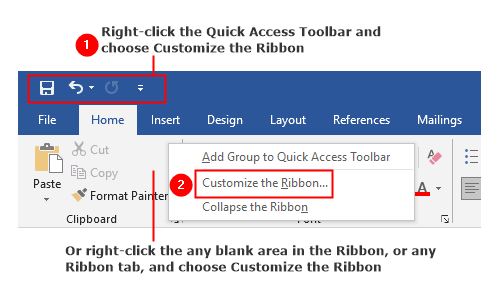
If you like Auto Scroll, put its command on Quick Access Toolbar or Ribbon.
- Choose
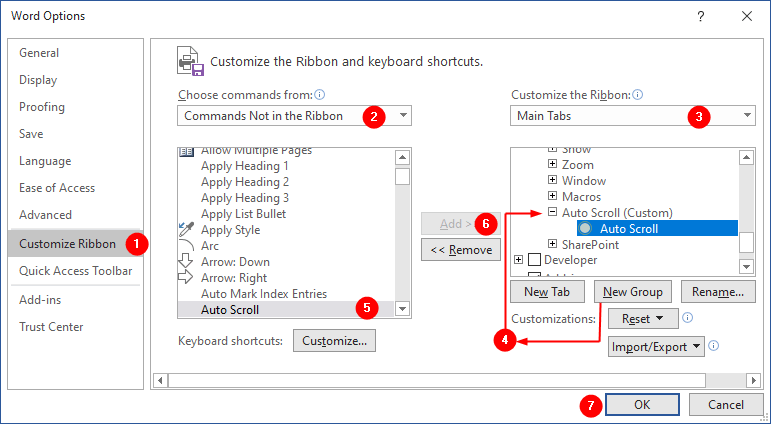
File > Options, and clickCustomize Ribbon(or clickQuick Access Toolbar) from the left pane (as shown in above image). - Choose
Commands Not in the Ribbonfrom the “Choose commands from” dropdown menu. - Select
Main Tabsfrom the “Customize the Ribbon” dropdown menu. - Select the
Viewtab in the list of right side (under the Customize the Ribbon menu), click on theNew Groupbutton to create a new group within the tab you selected. Then select the newly created group and click onRenameto give it a name, such as,Auto Scroll. - Select your custom group,
Auto Scroll, in the list on the right side of the screen. Select theAuto Scrollcommand button from the list on the left side of the screen (under the Choose command from menu). - Click on the
Addbutton to add theAuto Scrollcommand to theAuto Scrollgroup. - Click OK to confirm the change.
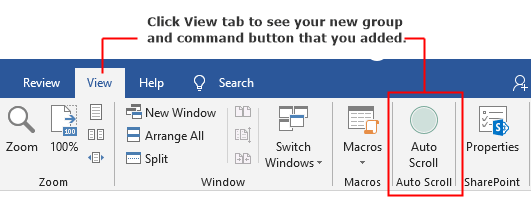
On viewing the View tab on the ribbon, you will see your new group and command button that you added.
Assign Keyboard Shortcut
You can also make your own keyboard assignments. Choose File > Options > Customize Ribbon, and then click the Customize button beside Keyboard shortcuts under the left-hand list. Assign Alt+P to the AutoScroll command. To assign keyboard shortcut:
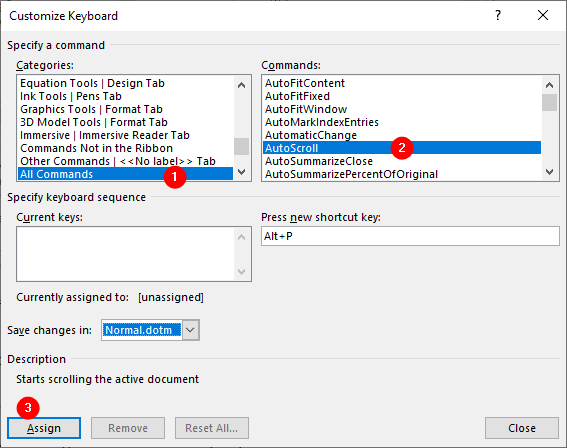
- Choose
File > Options > Customize Ribbon. - Click the
Customizebutton to the right of Keyboard shortcuts, below the left list. - The Customize Keyboard dialog box opens. Choose
All Commandsfrom theCategorieslist. - Choose
AutoScrollfrom theCommandslist. - Click in the
Press new keyboard shortcut keybox, and then pressAlt+P(or any other key combination). - Click
Assign, close the Customize Keyboard dialog box, and click OK to close the Word Options.
If Word prompt to save changes to Normal.dotm template, click Yes to saving this change.
