Create a bulleted list
Enter the list items as separate paragraphs, and then select the paragraphs. On the Home tab, in the Paragraph group, click the Bullets button or click the Bullets arrow and click the bullet symbol from the Bullet Library you want to display before each list item.
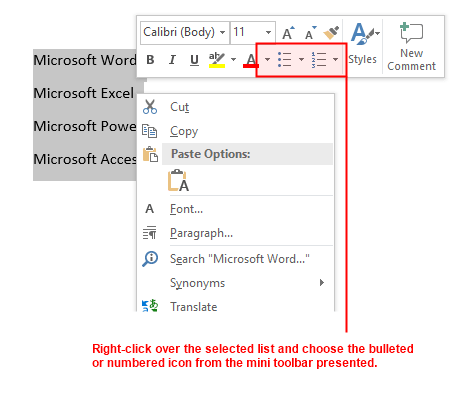
Or right-click over the selected paragraph and click the Bullets button or Bullets arrow from the mini toolbar presented, as illustrated in the following figure:
You can also use the “Automatic bulleted lists” feature to start a bulleted list. To begin a bulleted list, simply type * or > and press the spacebar. When you want to end either kind of list, press Enter twice.
Change Bullet Symbol
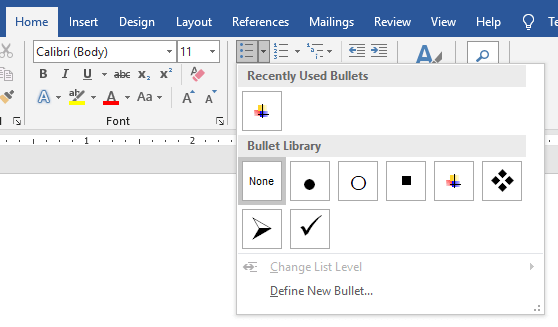
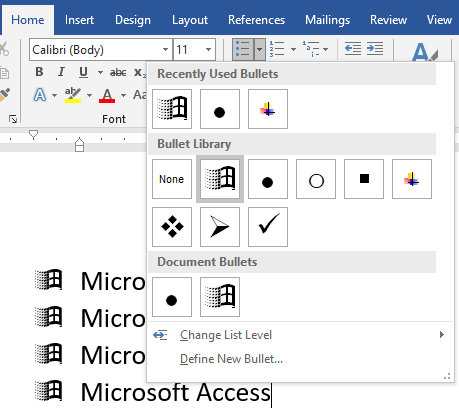
To change the bullet symbol of bulleted list items, click anywhere in the list, click the Bullets arrow, and click the symbol you want to use from the Bullet Library:
Defining a new bullet symbol
- On the
Hometab, in theParagraphgroup, click theBulletsarrow, and then clickDefine New Bullet. - The “Define New Bullet” dialog box appears. The box contains three buttons: under the heading “Bullet character”:
Symbol: select a symbol from a list of fonts.Picture: select an image to define as a bullet.Font: alter the bullet color, size, and other attributes of the bullet.
- Click the
Symbol...button under the Bullet character heading to display the Symbol dialog box.
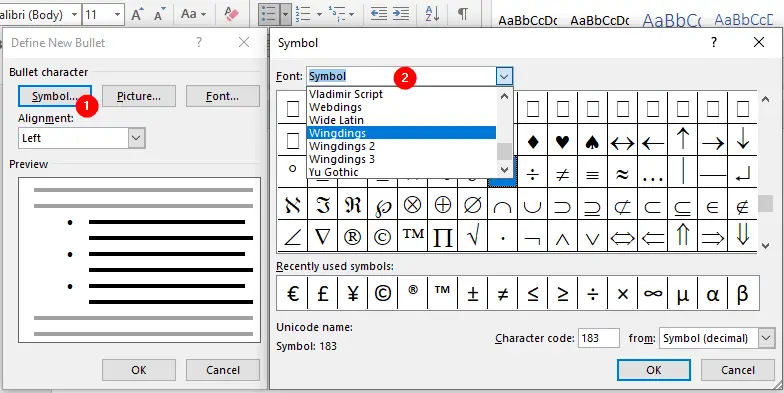
- Scroll through the Font: drop-down list to select a font face. The most popular bullet fonts are Webdings, Wingdings, Wingdings 2, and Wingdings 3, shown in the above figure.
- Choose an appropriate symbol to insert as your bulleted list icon.
- Click OK button twice to apply the new bullet symbol.
Change bullet color and size
If you are not satisfied with the presentation of your bulleted list, follow these steps to adjust the attributes of your bulleted list:
- Select the entire list or click anywhere in the bulleted list.
- On the
Hometab, in theParagraphgroup, click theBulletsarrow, and then clickDefine New Bullet. - Click Font button
- Use the Font dialog box to alter the font color, size, and other attributes to suit your bulleted list.
- Click OK to apply the changes.
Use Images as Bullets
Follow these steps to use an image as a symbol for the bulleted list:
- Click anywhere in the bulleted list.
- On the
Hometab, in theParagraphgroup, click theBulletsarrow, and then clickDefine New Bullet. - Click the
Picturebutton to seeInsert Pictureoptions:
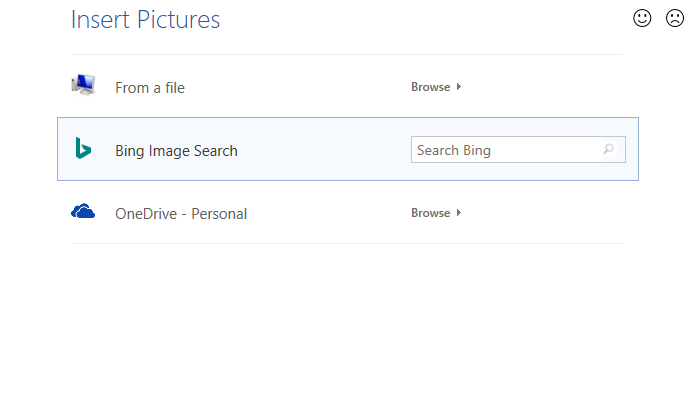
The dialog box shows three options:
- From a file
Click Browse to locate an image from your computer. - Bing Image Search
Write a keyword to search an image online - OneDrive – Personal
Click Browse to locate an image from your OneDrive folders.
Choose an image using one of the above options to insert as a bulleted list, click on the Insert button, and click OK.
More Tutorials on Word Lists:
- Bullets and Numbering
- Create and Customize Bulleted List
- Create and Customize a Numbered List
- Fix Numbering Problems in Numbered Lists
- Multilevel Lists
- Define new Multilevel list dialog box
- Define Multilevel List with “ListNum field list name”
List Numbering using SEQ Fields
Sort Paragraphs or Lists Alphabetically
