This tutorial covers the following topics:
Table Break
Follow these steps to break a table into two separate tables:
- Select or click the row where you want the break to occur.
- Click
Layoutcontextual tab. - Click Split Table in the
Mergegroup. - The table will split above the selected row.
To break a table into two pages:
- Click any cell in the row where you want the break to occur.
- Press Ctrl+Enter.
- The table will split into two pages.
Row Break
You can use the Allow row to break across pages option when you need to keep particular rows together, see the following example:
Follow these steps to allow a row to span on two pages:
- Select the row (or click anywhere in the row).
- Click
Propertiesin theTablegroup of theLayouttab (or right-click the selection and chooseTable Propertiesfrom the shortcut menu). - Click the
Rowtab. - Uncheck the
Allow row to break across pagescheck box. - Click
OK.
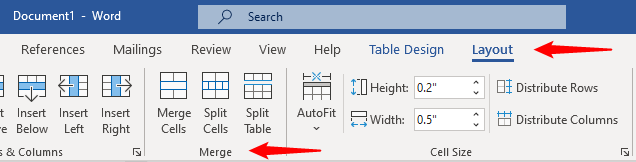
Split Cells
Splitting cells is the opposite of merging cells. Follow these steps to divide a cell into multiple cells:
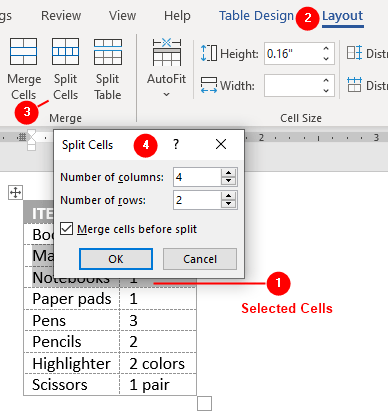
- Select the cell, row, or column you want to split.
- Click
Layoutcontextual tab. - Click Split Cells in the
Mergegroup. - The
Split Cellsdialog box appears. - Enter the number of columns and rows.
- Press
OK.
If you checked the Merge Cells Before Split check box, all the selected cells will be merged into one cell, and then split into the numbers of rows and columns you set. If unchecked, each selected cell will be converted to the requested numbers of columns (you can not set the number of rows when the box is unchecked).
Merge Cells
Mostly you merge the first row of the table for making the table’s inner heading. In the following example, month May needs to occupy the first row in a bold and large format to give a clear update on what the table is all about:
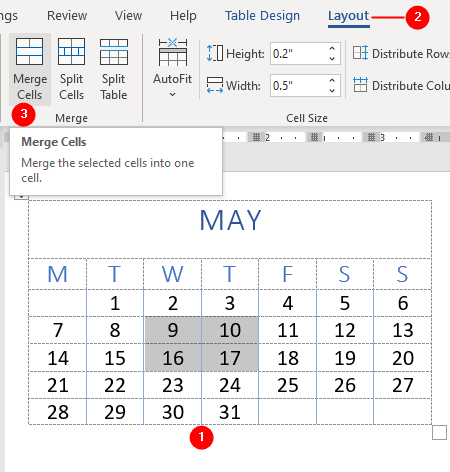
To merge cells:
- Select cells, row, or column you want to merge.
- Click
Layoutcontextual tab. - Click Merge Cells in the
Mergegroup.
Moving Rows and Columns
To move rows or columns:
- Select the rows or columns (or cell) you want to move.
- Drag the selection to the new location.
- The table rows or columns are relocated as you specified.
More “Working with Word Tables” Tutorials
- Insert Tables
- Insert and Delete Rows, Columns and Cells
- Wrap text around the table
- Table Borders and Shading
- Select Table, View Gridlines, Use Table Properties
- Resize tables, rows, columns, and cells
- Repeat heading rows on next pages
- Break, Split & Merge Cells, Rows, and Tables
- Set Table & Cell Alignment and Change Text Direction
- Use Formula in Tables and Paragraphs
