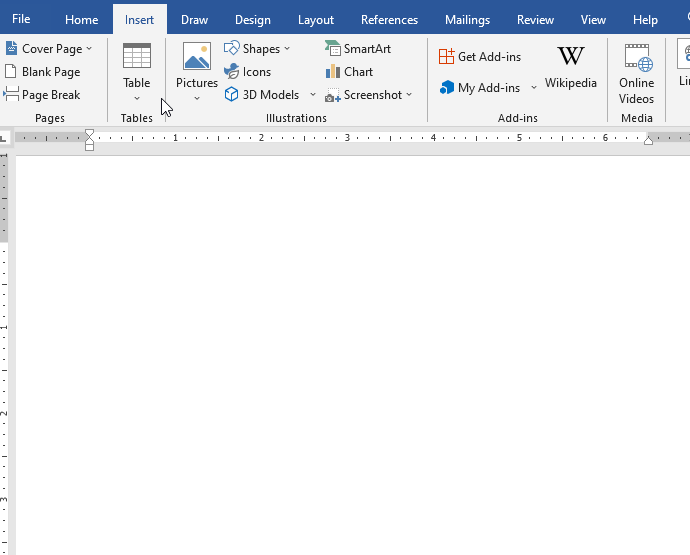
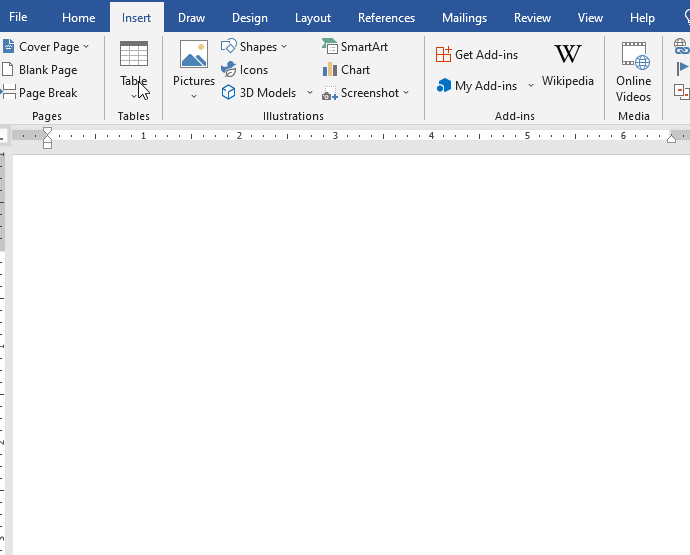
To create a table in the Word document, click the Insert tab and in the Tables group click Table drop-down menu. See the following figure:
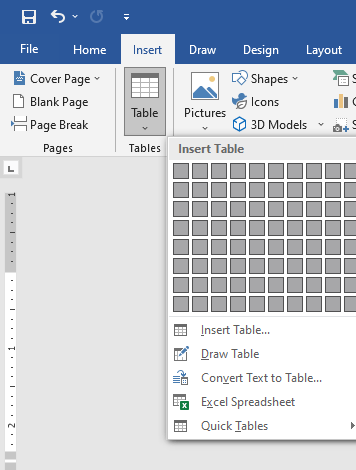
The Table drop-down menu offers multiple ways to insert tables in the document:
- Use Grid to Insert Table
Choose the number of rows and columns in the gallery to create a table. - Insert Table
Use theInsert Tabledialog box to create a table. - Draw Table
Use the table freehand tool on the document to create a table. - Convert Text to Table
UseConvert Text to Tabledialog box to convert paragraphs, comma separated text, etc. to create a table.- Convert Table to Text
You also can convert a table into the delimited text.
- Convert Table to Text
- Excel Spreadsheet
Use this option to embed an Excel spreadsheet. - Quick Tables
Insert a predesigned table.
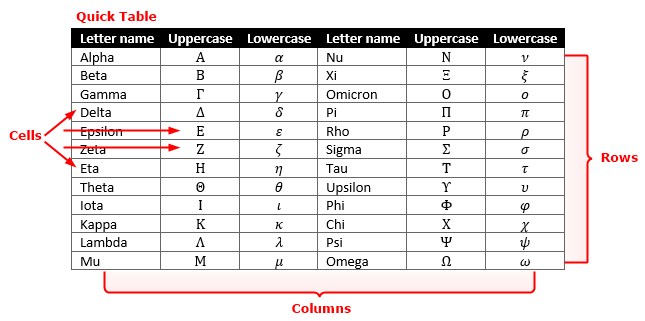
Table Grid Gallery
You can create a blank or empty table by using the Insert Table grid. The grid represents columns and rows of cells. Using this gallery, you can insert a table with a maximum of 10 columns and 8 rows (which you can modify later):
- Click
Inserttab and then in theTablesgroup clickTabledrop-down menu. - In the grid (available under the
Tabledrop-down), move the cursor over the grid to see the live preview of the table on the document. - Click the moues butotn on the grid when the number of columns and rows you want are highlighted. You can see the table dimension in the grid header displayed as
columns x rows, for example 5×7. - A blank table will inserted in the document containing number of rows and columsn you highlighted in the grid.
Insert Table Dialog Box
The Insert Table dialog box gives you many customizable options to create an empty table by specifying the number of columns & rows and the width of columns, etc.:
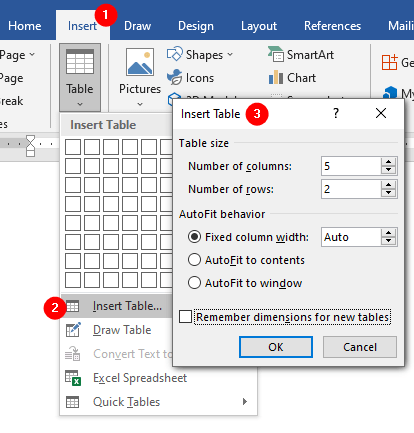
AutoFit behavior in the Insert Table dialog box:
- Fixed column width
Choose a specific width for the columns. - AutoFit To Contents
Choose this option to adjusts the width of columns to accommodate the data you enter. - AutoFit To Window
If you choose this option, the table will be automatically resizes according to the size of Word’s window size.
Draw Table
You can use the Draw Table feature to manually create an empty table. Click the Insert tab and choose the Table drop-down menu and then click on the Draw Table option. The pointer changes to a pencil that you can use to draw the table by clicking and dragging the mouse. See the following figure:
Note: The contextual Table Tools appear with Draw Table selected in the Draw group on the Layout tab. If you add a line you want to remove, in the Draw group click the Eraser tool then click the line you want to delete.
Convert Text to Table
You can convert any existing data as a table that is separated by paragraphs, tabs, commas, or any specific single character that you specify in the Convert Text to Table dialog box.
First, select the text, and then on the Insert tab, click Table drop-down menu and choose Convert Text To Table:
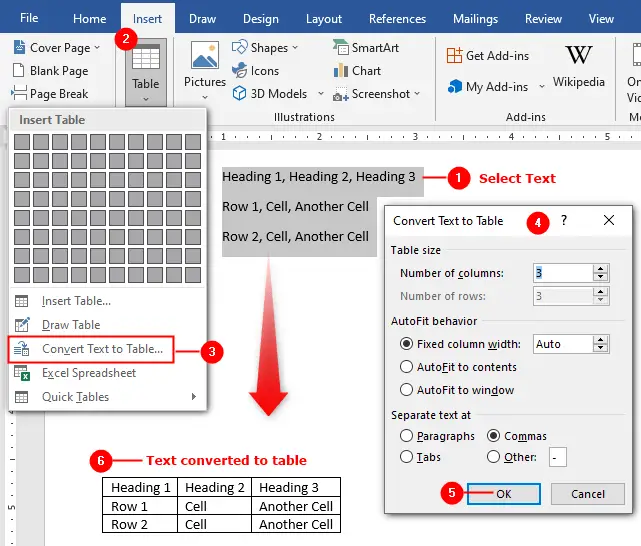
If necessary, specify the number of columns, and specify the column width in the “Convert Text to Table” dialog box.
In Separate text at area, by default, Word automatically selects the delimiter character according to the selected text. You can choose paragraphs, commas, tabs, or any other character specified by you.
Make your choices and click OK. Word converts the text into a new table.
Convert Table to Text

- Click the table
- And in the
Table Toolsclick theLayouttab. - Choose
Convert To Textcommand in theDatagroup. - In the “Convert Table To Text” dialog box, select the character you want Word to insert as delimiter, for example: commas, paragraph marks, or another character of your choice.
- Click
OKto convert the table to text.
Insert an Excel Spreadsheet
You can insert an Excel spreadsheet in the document. To insert a spreadsheet:
- Click the
Inserttab, clickTabledrop-down, and then clickExcel Spreadsheet. - Enter the data you want in the spreadsheet, you can use all the Excel features such as functions and formulas on the data.
- To close the spreadsheet:
- Close the spreadsheet window if its open in new window
- Or, click outside the spreadsheet snapshot on Word document area
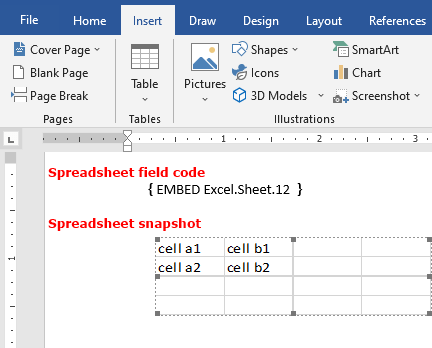
- A snapshot of the spreadsheet content or a field will be inserted on the document.
To modify spreadsheet data:
- Double click on the spreadsheet’s snapshot
- Or, right-click on the spreadsheet’s field code and choose
Worksheet Objectand chooseEdit.
Note: To convert spreadsheet field code into snapshot, click on the field code and press Shift+F9 to toggle the field code.
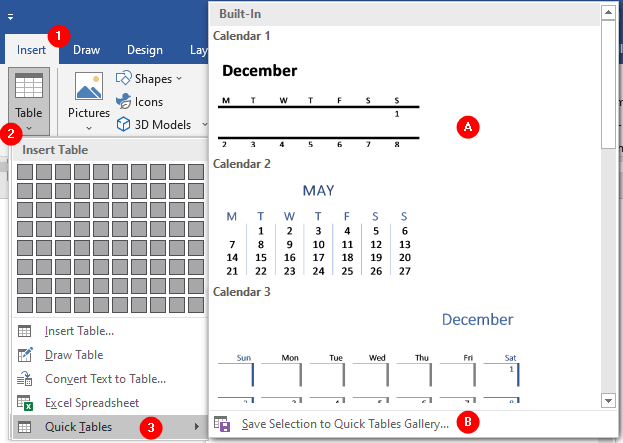
Quick Tables
Quick Tables are predefined tables of formatted data that you can replace with your own data. The built-in Quick Tables gallery includes the following type of tables:
- Calendars
- Simple tables
- Tables with subheadings
- Tabbed lists.
You can also create your own quick table by saving the table to the Quick Tables gallery so that you can easily insert a frequently used table structure and data into any document.
To insert a Quick Table:
- Click
Inserttab - In the
Tablesgroup click theTabledrop-down. - Then click
Quick Tablesoption to expand the gallery. - Scroll through the gallery and click on a pre-defined table style to insert it on the document.
Save Your Own Table as a Quick Table
You can save any table to the Quick Tables gallery. To save a table to the Quick Tables gallery:
- Select the table.
- Click
Inserttab - In the
Tablesgroup click theTabledrop-down. - Then click
Quick Tablesoption to expand the gallery, and then clickSave Selection to Quick Tables Gallery.
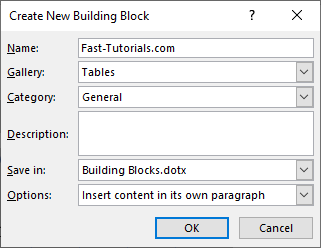
In the Create New Building Block dialog box, write a name for the table and click OK. If Word prompts to save the changes in the “Building Blocks” template, click the Save to make the table available in the “Quick Tables” gallery.
Table Tools
The contextual
Table Toolstab appears on the Ribbon when you insert a table or click in a table. The Table Tools has two sub-tabs:Table DesignandLayout, so you can customize the inserted table with comfort. We’ll discuss the Table Tools later.
More “Working with Word Tables” Tutorials
- Insert Tables
- Insert and Delete Rows, Columns and Cells
- Wrap text around the table
- Table Borders and Shading
- Select Table, View Gridlines, Use Table Properties
- Resize tables, rows, columns, and cells
- Repeat heading rows on next pages
- Break, Split & Merge Cells, Rows, and Tables
- Set Table & Cell Alignment and Change Text Direction
- Use Formula in Tables and Paragraphs
